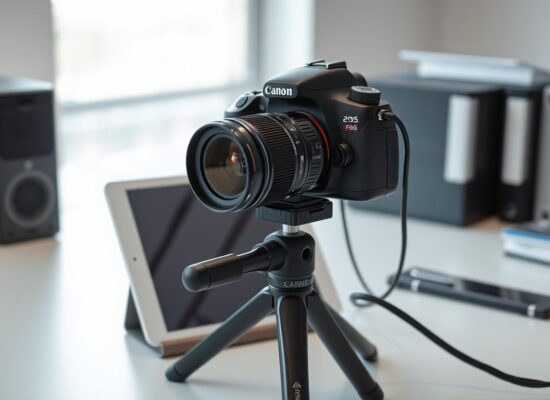

Navigating your Canon camera to review images should be simple, whether you’re a beginner or an enthusiast. This guide helps you master playback functions on popular models like the EOS Rebel T7/2000D and 60D.
With intuitive controls, you can swiftly access photos stored on your memory card. Learn to zoom, rotate, or browse thumbnails effortlessly. The Image.canon app also offers seamless backups to Google Photos, saving time for digital photography lovers.
Key Takeaways
- Activate playback mode with a single button press.
- Navigate images using cross keys or the main dial.
- Switch between single and thumbnail views for faster browsing.
- Zoom in for detailed inspection of your shots.
- Rotate images directly from the playback menu.
How to Look at Photos on Your Canon Camera: Activating Playback Mode
Reviewing your shots on a Canon EOS is straightforward with the right steps. Whether you’ve just captured a stunning landscape or a portrait, accessing images quickly is essential. Here’s how to master the playback mode on popular models like the EOS Rebel T7 and 60D.
Finding the Playback Button
Locate the blue ▶️ symbol on your camera—this is the playback button. On the EOS Rebel T7, it sits at the top-right. Press it to enter playback mode and view your latest shot.
“The playback function saves time. I check focus and exposure right after shooting.”
What the Default Display Shows
The monitor reveals the last image taken, alongside key data like shutter speed and f-stop. Folders and file numbers appear for easy organisation.
Related Posts:


| Feature | EOS Rebel T7 | EOS 60D |
|---|---|---|
| Playback Button | Top-right | Rear panel |
| Default Display | Basic shooting data | Advanced histogram |
If nothing appears, check your memory card. An empty card or corrupted files can prevent playback.
Navigating Through Your Photos Efficiently
Effortlessly browse your captured moments with these quick navigation tips. Canon cameras offer intuitive controls to flip through *files* without hassle. Whether you’re reviewing a single shot or hundreds, these methods save *time*.
Using the Cross Keys to Scroll
Press the cross keys (right/left) to move between *images* one by one. For thumbnails, use the up/down buttons. This is ideal for checking recent shots or fine-tuning compositions.
“The cross keys let me swiftly compare similar shots—crucial for event photography.”
Jumping Through Images with the Main Dial
Rotate the main dial to *jump* 10 *images* at once. Adjust this in Playback Menu 2 for larger skips. Perfect for locating specific *pictures* from a shoot.
| Navigation Method | Best For | Customisation |
|---|---|---|
| Cross Keys | Detailed review | N/A |
| Main Dial | Bulk skipping | Set jump intervals |
Filter by date or rating to find *files* faster. For weddings, date-based *jump* is a lifesaver.
Viewing Multiple Images at Once: Thumbnail Mode
Efficiently reviewing batches of *images* is simpler with Canon’s thumbnail mode. This feature lets you scan dozens of files simultaneously, perfect for post-shoot culling or locating specific shots. Models like the EOS Rebel T7 support 4 or 9 thumbnails per screen, balancing detail and overview.
Switching to Index View
Press the Index/Reduce button to toggle between single and multi-image display. Rotate the main dial to scroll pages—ideal for skimming without activating jump mode. Note: movie files show sprocket-hole borders but won’t play in this view.
Selecting and Managing Files in Thumbnail Mode
Batch actions save time. Highlight a thumbnail and press Set to delete or protect multiple images. RAW and JPEG formats are visually distinct, aiding quick sorting. Pro tip: Use this view to gauge memory card space via the frame counter.
- Visual identifiers: Spot RAW (CR2/CR3) files by their unique icons.
- Workflow boost: Initial culling here speeds up editing later.
- Limitations: Movies require full-screen playback.
| Feature | Rebel T7 | EOS 60D |
|---|---|---|
| Thumbnail Options | 4 or 9 | 4, 9, 36 |
| Movie Display | Sprocket border | Sprocket border |
Zooming In for a Closer Look at Your Photos
Pixel-perfect reviews ensure every shot meets your standards. Canon’s zoom function lets you inspect images at 10x magnification—ideal for checking focus or spotting dust spots. Whether you use an EOS Rebel or a professional model, this feature is indispensable for critical work.

Magnifying Images for Detail Inspection
Press the magnify button (🔍) to enter zoom mode. Rotate the main dial to adjust magnification levels. A white navigation box shows the visible area, helping you track inspected sections.
- Focus peaking: Identifies sharp edges in low light, highlighting potential blur.
- Creative analysis: Study textures in landscapes or fabric details in portraits.
- Quick exit: Tap the playback button to return to full-screen view instantly.
Navigating Zoomed-In Photos
Use the cross keys to pan across images while zoomed. The display updates the navigation thumbnail in real time. For comparisons, rotate the main dial to jump between shots while keeping the zoomed area consistent.
“Zooming into eyelashes reveals focus accuracy—essential for client portraits.”
| Function | EOS Rebel T7 | EOS 60D |
|---|---|---|
| Max Zoom | 10x | 10x |
| Navigation Aid | White box | White box + histogram |
| Movie Support | No | No |
Note: Movies cannot be zoomed during playback due to resolution constraints. For stills, this tool elevates your quality control process.
Rotating Images for Better Viewing
Correcting the orientation of your shots ensures they display properly on any device. Whether reviewing on your camera’s monitor or transferring to a computer, quick adjustments save time. Canon’s auto-rotate and manual tools simplify this process.
Adjusting Auto-Rotate Settings
Head to Setup Menu 1 to configure rotation preferences. Choose between:
- Camera + Computer: Rotates images on both devices.
- Computer Only: Fixes orientation during transfers.
- Off: Disables rotation entirely.
Pro tip: Disable auto-rotate for tripod portraits to avoid flipped previews.
Manually Rotating Photos During Playback
Press the Quick Control button (Q) while in playback mode. Select the rotation icon and choose 90°, 180°, or 270°. Changes save to EXIF data, ensuring consistency across platforms.
“Manual rotation is a lifesaver for event photographers—no more sideways shots in client galleries.”
| Model | Rotation Options | Menu Location |
|---|---|---|
| EOS Rebel T7 | 90°–270° | Playback Menu 2 |
| EOS 60D | 90°–270° + EXIF | Playback Menu 3 |
Note: Some edits won’t save if auto-rotate is disabled. Check your settings for permanent adjustments.
Conclusion
Mastering your Canon camera’s playback features streamlines your workflow. From quick playback activation to detailed zoom inspections, these skills enhance efficiency. Thumbnail navigation and rotation adjustments save time during reviews.
Don’t forget backups. The Image.canon app syncs effortlessly with Google Photos, safeguarding your shots. These techniques apply to newer models, ensuring future-proof expertise.
Keep your memory card organised and the monitor clean for crisp image checks. With these tips, every shoot becomes smoother.
FAQ
Where is the playback button on a Canon EOS camera?
The playback button is usually marked with a blue triangle icon and is located near the LCD screen. Pressing it activates playback mode to view your images.
How do I scroll through photos on my Canon EOS Rebel?
Use the cross keys (left and right arrows) to move between images. The main dial can also jump through multiple files at once.
Can I view multiple photos at the same time?
Yes. Press the zoom-out button to switch to thumbnail mode, displaying several images on the screen for quicker navigation.
How do I zoom in on a photo for details?
Press the zoom-in button (marked with a magnifying glass) to enlarge the image. Use the cross keys to move around the zoomed-in area.
Why won’t my photos rotate automatically?
Check the auto-rotate settings in the playback menu. If disabled, images shot in portrait orientation won’t adjust automatically.
Can I manually rotate a photo during playback?
Yes. Open the playback menu, select “Rotate,” and use the dial to adjust the image orientation as needed.
What should I do if my photos aren’t displaying?
Ensure the memory card is properly inserted. If images still don’t appear, check if the files are corrupted or formatted incorrectly.
How do I exit playback mode?
Half-press the shutter button or press the playback button again to return to shooting mode.