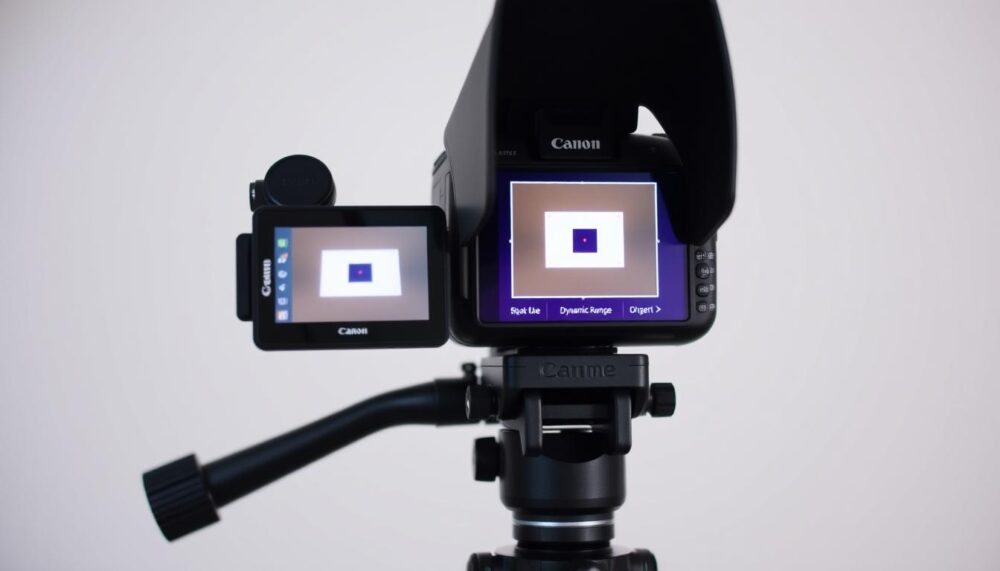
For photographers, achieving the perfect balance between highlights and shadows is essential. Proper calibration of your camera ensures that your image retains detail in both bright and dark areas. This is particularly important for genres like landscape and sports photography, where dynamic range plays a crucial role.
Many Canon users often face issues with blown highlights or lost shadow details. These problems can be minimised by optimising your camera’s settings. Whether you shoot in RAW or JPEG, understanding the differences in calibration can significantly enhance your results.
This guide will walk you through a 10-step process to optimise your Canon camera. By following these steps, you can preserve intricate details and achieve professional-quality photos. Let’s dive into the practical benefits of mastering this technique.
Key Takeaways
- Proper calibration preserves detail in highlights and shadows.
- RAW and JPEG formats require different calibration approaches.
- Optimising settings minimises blown highlights in your images.
- Enhanced dynamic range benefits landscape and sports photography.
- Following a structured process ensures consistent results.
Understanding Dynamic Range in Photography
Dynamic range is a cornerstone of photography, defining the spectrum of light a camera can capture. It represents the difference between the brightest and darkest areas an image can retain detail. For photographers, mastering this concept is essential to achieve balanced and professional results.
The human eye perceives over 20 stops of dynamic range, while most cameras capture between 10 and 14 stops. This gap highlights the challenges photographers face when replicating what the eye sees. High-contrast scenes, such as snow-covered landscapes, often push camera sensors to their limits.
What is Dynamic Range?
Dynamic range is the ratio between the maximum and minimum recordable light. It determines how well a camera can handle bright highlights and deep shadows. For instance, titanium white reflects 97% of light, while soot-black reflects only 2%. Capturing both extremes in a single shot requires precise calibration.
An 18% grey card plays a crucial role in metering. It serves as a reference point for achieving accurate exposure. By using this tool, photographers can ensure their images retain detail across the entire tonal range.
Why is Dynamic Range Important for Canon Cameras?
Canon cameras, like all digital sensors, face limitations in capturing extreme contrast. Without proper calibration, images may suffer from “blown highlights” or “noisy shadows.” Techniques like HDR imaging can help bridge the gap, but understanding the fundamentals is key.
Calibration ensures that your camera performs optimally in challenging lighting conditions. By addressing these issues, photographers can produce images that are both detailed and true to life.
The Role of Exposure Meter Calibration
Accurate exposure metering is the foundation of capturing well-balanced images. It ensures that your image retains detail across the tonal spectrum, from highlights to shadows. Without proper calibration, even the most advanced cameras can struggle in challenging lighting conditions.
Exposure metering systems measure light to determine the optimal settings for your shot. However, they are not infallible. Reflected-light meters, for instance, assume a scene reflects 18% of light, which can lead to inaccuracies in high-contrast scenarios.
How Exposure Meter Calibration Affects Dynamic Range
Calibration directly impacts your camera’s ability to handle dynamic range. For example, JPEG files have a 2.5-stop buffer to preserve highlights, while RAW files offer more flexibility with calibration points as low as 11%. This variability allows photographers to fine-tune their results.
Technologies like Apical’s Iridix enhance highlight preservation, ensuring critical details are not lost. In high-contrast scenes, such as a skier against snow, exposure compensation can make a significant difference. Canon’s Highlight Tone Priority further aids in retaining detail in bright areas.
Understanding the 18% Reflectivity Principle
The 18% reflectivity principle is central to exposure metering. It serves as a baseline for measuring light, ensuring consistent results across different scenes. However, this principle can falter in extreme conditions, such as snow or dark shadows.
By understanding this principle, photographers can adjust their metering to achieve accurate exposure. Tools like grey cards provide a reliable reference, helping to bridge the gap between the camera’s interpretation and the actual scene.
Preparing Your Canon Camera for Calibration
Proper preparation ensures your Canon camera delivers optimal results during calibration. This involves gathering essential tools, adjusting settings, and selecting the right lighting conditions. A well-organised setup simplifies the process and enhances accuracy.
Essential Tools and Settings
To begin, ensure you have the necessary tools. A grey card is indispensable for accurate metering, while a tripod stabilises your camera during the process. Additionally, software like RawDigger helps analyse exposure data effectively.
For optimal results, set your aperture between f/5.6 and f/8. This range provides a balance between depth of field and sharpness. A baseline ISO of 200 is recommended to minimise noise and maintain image quality.
Choosing the Right Lighting Conditions
Lighting plays a critical role in calibration. Aim for daylight with a colour temperature of 5500K, as it closely resembles natural light. Avoid mixed lighting environments, as they can skew results and complicate the process.
Disabling auto-ISO is also advisable. This ensures consistent exposure readings, allowing you to fine-tune your settings without interference. For lens calibration, a cardboard mat setup can help test peripheral focus points accurately.
Step 1: Setting Up Your Camera for Calibration
A well-prepared setup ensures your camera delivers consistent and sharp results. Proper configuration minimises errors and enhances the accuracy of your calibration process. This step focuses on mounting your equipment and adjusting key settings.
Mounting Your Camera on a Tripod
Stability is crucial for precise calibration. Begin by levelling your tripod head to ensure your camera remains steady. Use a spirit level or built-in levelling tools for accuracy. This prevents misalignment and ensures consistent results across multiple shots.
For critical sharpness, consider enabling mirror lock-up. This feature reduces vibrations caused by the mirror movement, particularly in DSLR models. Pair this with a remote shutter release to avoid any physical contact with the camera during exposure.
Adjusting Aperture and Focus
Selecting the right aperture is essential. A mid-range setting, such as f/5.6 to f/8, balances depth of field and sharpness. For lens calibration, use the defocus technique to identify focus inconsistencies. This involves slightly adjusting focus to pinpoint errors.
Manual focus override is recommended for precise control. This allows you to fine-tune focus without relying on autofocus systems. For wide-angle setups, ensure peripheral focus points are tested using a cardboard mat. This is particularly useful for prime lens calibration, where focus accuracy is critical.
- Level your tripod head for stability.
- Enable mirror lock-up to reduce vibrations.
- Use a mid-range aperture for balanced sharpness.
- Apply the defocus technique for focus accuracy.
- Test peripheral focus points with a wide-angle setup.
By following these steps, you can ensure your camera is ready for accurate calibration. This foundation sets the stage for achieving professional-quality images in various shooting scenarios.
Step 2: Using a Grey Card for Accurate Calibration
Mastering the use of a grey card can significantly improve the accuracy of your camera’s calibration. This tool ensures consistent exposure and white balance, which are critical for achieving professional-quality results. Proper positioning and technique are key to maximising its effectiveness.
Positioning the Grey Card
Place the grey card at a 45° angle to the light source. This minimises specular reflections, which can skew your readings. Ensure the card fills the frame, especially within the 200×400 pixel analysis zone, for precise metering.
Activate spot metering to focus on the grey card. This setting ensures the camera measures light accurately from the card, rather than the surrounding environment. For example, in mixed lighting, spot metering isolates the card’s reflective value.
Taking the Initial Shot
Use a multiple exposure technique, such as +5EV bracketing, to capture a range of shots. This approach helps identify the optimal exposure setting. RAW capture is recommended over JPEG, as it provides greater flexibility in post-processing.
Set a custom white balance using the grey card. This ensures accurate colour reproduction across different lighting conditions. Avoid specular reflections by adjusting the card’s angle or using diffused lighting.
| Setting | Recommendation |
|---|---|
| Lighting Angle | 45° to minimise reflections |
| Metering Mode | Spot metering for accuracy |
| File Format | RAW for greater flexibility |
| White Balance | Custom setting using the grey card |
By following these steps, you can ensure your calibration process is precise and reliable. This foundation sets the stage for achieving consistent results in various shooting scenarios.
Step 3: Analysing the Exposure Meter Readings
Analysing exposure meter readings is a critical step in achieving balanced and detailed images. This process ensures that your exposure settings accurately capture the scene’s tonal range. By interpreting the histogram and identifying potential issues, you can refine your settings for optimal results.
Interpreting the Histogram
The histogram is a graphical representation of your image’s tonal distribution. It shows the difference between shadows, midtones, and highlights. A well-balanced histogram typically has a smooth curve without significant spikes at either end.
RGB histograms provide even more detail by displaying individual colour channels. This helps detect channel saturation, which can lead to colour inaccuracies. For instance, RawDigger’s Ov.Exp warning highlights overexposed areas, allowing you to adjust settings accordingly.
“Expose to the Right (ETTR) maximises the sensor’s dynamic range, ensuring more detail in shadows and midtones.”
Identifying Overexposure and Underexposure
Overexposure occurs when highlights are too bright, losing detail. Underexposure, on the other hand, results in dark shadows with noisy or missing information. Highlight clipping warnings in tools like RawDigger help identify these issues early.
Practical EV compensation calculations can correct these problems. For example, a standard deviation of σ=10.3 indicates a balanced exposure, while higher values suggest overexposure. Adjusting settings based on these readings ensures consistent results.
| Histogram Feature | Interpretation |
|---|---|
| Left Spike | Underexposed shadows |
| Right Spike | Overexposed highlights |
| Smooth Curve | Balanced exposure |
| RGB Separation | Colour channel saturation |
By mastering these techniques, you can ensure your images retain detail across the entire tonal range. This step is essential for achieving professional-quality results in various shooting scenarios.
Step 4: Adjusting Exposure Compensation
Fine-tuning exposure compensation is a vital step in ensuring your images retain detail across all lighting conditions. This adjustment allows you to control the brightness of your shots, preventing overexposed highlights or underexposed shadows. By mastering this technique, you can achieve balanced and professional results.
How to Add Exposure Compensation
Canon’s Quick Control Dial simplifies the process of adjusting exposure compensation. Rotate the dial to increase or decrease the amount of light captured. For instance, a +3EV adjustment is ideal for recovering details in shadow-heavy scenes. Always test bracketing with 1/3EV increments to find the optimal settings.
“Safety margins vary by genre. Landscape photography often requires a higher EV adjustment, while portraits benefit from subtle changes.”
Testing the Adjusted Settings
After applying exposure compensation, evaluate the results using your camera’s LCD preview. However, be cautious of its accuracy. Shadow noise reduction benefits are best assessed in post-processing, where RAW files provide greater flexibility. Focus shift testing, as referenced in source 3, ensures consistent sharpness across all frames.
| Adjustment | Benefit |
|---|---|
| +3EV | Recovers shadow details |
| 1/3EV Bracketing | Finds optimal exposure |
| Custom White Balance | Ensures accurate colours |
| RAW Capture | Maximises post-processing flexibility |
By following these steps, you can refine your exposure settings and achieve consistent, high-quality results. This approach is particularly effective in high-contrast scenarios, where detail preservation is critical.
Step 5: Verifying the Calibration with RawDigger
RawDigger is a powerful tool for confirming your calibration results. It provides detailed insights into your raw file, helping you identify overexposure and ensure accurate settings. This step is essential for achieving professional-quality images.
Using RawDigger to Check Overexposure
Begin by uploading your raw file into RawDigger. The interface allows you to analyse individual colour channels, ensuring no detail is lost. For example, the 95% pixel coverage method ensures consistent results across the entire frame.
RawDigger’s black level settings help identify areas where shadows may lose detail. The practical maximum value formula, such as 4029/418.7=3.27EV, ensures your exposure is within the optimal range. This way, you can avoid blown highlights and retain critical details.
Interpreting the Results
Once the analysis is complete, focus on the histogram and channel-specific data. Look for spikes in the RGB channels, as these indicate potential overexposure. RawDigger’s Ov.Exp warning highlights areas that exceed the sensor’s dynamic range.
Colour channel variability can also affect your results. For instance, red channels often saturate faster than blue or green. Adjust your settings accordingly to achieve a balanced exposure.
| Feature | Benefit |
|---|---|
| Channel Analysis | Identifies overexposure in individual colours |
| Black Level Settings | Preserves shadow details |
| Ov.Exp Warning | Highlights overexposed areas |
| RGB Histogram | Ensures balanced exposure across all channels |
By mastering RawDigger, you can verify your calibration with confidence. This tool ensures your settings are precise, delivering consistent results in every shot.
Step 6: Fine-Tuning the Calibration for RAW Files
Fine-tuning your camera’s settings for RAW files ensures maximum detail and flexibility in post-processing. Unlike JPEG, RAW files retain more data, allowing for precise adjustments. This step focuses on optimising calibration points and adapting to different ISO settings.
Understanding RAW Calibration Points
RAW files offer greater latitude in calibration due to their higher bit depth. Canon’s Dual Pixel RAW technology enhances this flexibility, enabling adjustments in focus and bokeh. Testing ISO invariance ensures consistent performance across various lighting conditions.
Long Exposure Noise Reduction (NR) can impact calibration. While it reduces noise, it may also affect dynamic range. Balancing these settings is crucial for achieving optimal results.
Adjusting for Different ISO Settings
ISO-dependent calibration shifts are common in digital cameras. Native ISO ranges, such as ISO 100, provide the best performance. Extended ISO settings, while useful in low light, may introduce noise and reduce detail.
Expose to the Right (ETTR) is a recommended technique for low-light scenarios. It maximises the sensor’s dynamic range, ensuring more detail in shadows and midtones. However, avoid relying on “Exposure Simulation,” as it may not accurately represent RAW file data.
- Test ISO invariance for consistent performance.
- Balance Long Exposure NR with dynamic range needs.
- Prefer native ISO ranges like ISO 100 for optimal results.
- Use ETTR for low-light photography.
- Avoid “Exposure Simulation” pitfalls.
“14-bit processing in RAW files enhances tonal gradation, ensuring smoother transitions between highlights and shadows.”
By mastering these techniques, you can fine-tune your camera’s calibration for RAW files. This ensures professional-quality results in various shooting scenarios.
Step 7: Applying the Calibration in Real-World Scenarios
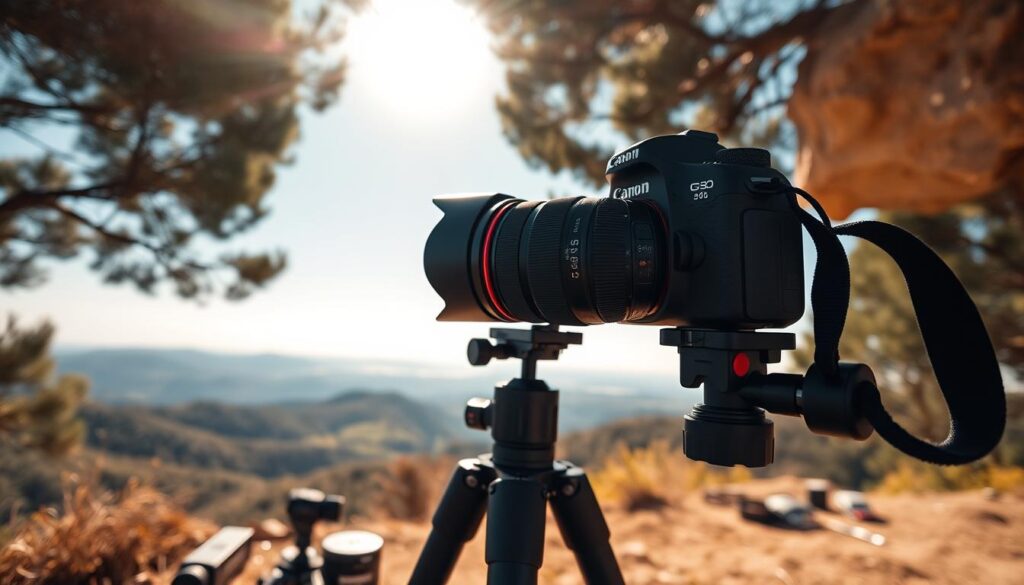
Applying calibration in real-world scenarios ensures your photography adapts to diverse lighting conditions. High-contrast environments, such as backlit skiers or snowfields, test your camera’s ability to retain detail. By mastering these techniques, you can achieve professional-quality results in any setting.
Testing the Calibration in High-Contrast Scenes
High-contrast scenes push your camera’s dynamic range to its limits. For instance, a backlit skier against a snowy background requires precise calibration to avoid blown highlights or lost shadow details. Bracketing is a useful technique here, capturing multiple exposures to ensure optimal results.
Graduated ND filters offer an alternative for balancing exposure in such scenarios. They reduce the brightness of the sky while preserving detail in the foreground. This is particularly effective in landscape photography, where contrast is often extreme.
Evaluating the Results
After capturing your shots, evaluate the results carefully. Look for preserved highlight textures and balanced shadow details. Tools like RawDigger can help analyse overexposure and ensure your calibration settings are accurate.
For weddings or events, bracketing is highly recommended. It ensures you capture every moment, even in challenging lighting conditions. Peripheral focus tests, as referenced in source 3, further enhance sharpness across the frame.
- Use bracketing for high-contrast scenes like beach or snowfield shots.
- Consider graduated ND filters as an alternative for balancing exposure.
- Evaluate highlight texture preservation in post-processing.
- Test peripheral focus points for consistent sharpness.
- Apply these techniques to cloudscape photography for stunning results.
By applying these methods, you can ensure your images retain detail and clarity in any scenario. This step is essential for achieving consistent, professional-quality results.
Step 8: Calibrating Lenses for Optimal Performance
Achieving sharp and precise focus is a cornerstone of professional photography. Proper lens calibration ensures your images are consistently sharp, even in challenging conditions. This step focuses on using a cardboard mat and testing peripheral focus points to optimise your setup.
Using a Cardboard Mat for Lens Calibration
A cardboard mat is an effective tool for lens calibration. Begin by aligning the mat’s grid with your camera’s sensor plane. This ensures accurate measurements across the frame. Live view magnification helps verify focus precision, especially for prime lenses like the EF 50mm f/1.2L.
Different focus motors, such as STM and USM, require unique calibration approaches. STM motors are quieter but may exhibit slight focus shifts. USM motors, on the other hand, offer faster and more reliable performance. Testing these differences ensures your lens performs optimally.
Testing Peripheral Focus Points
Peripheral focus points are often overlooked but are crucial for wide-angle shots. Use the mat’s grid to test these points, ensuring consistent sharpness across the frame. Decentering detection methods can identify alignment issues, while cross-type point limitations highlight areas needing adjustment.
“A +8 MFA adjustment, as referenced in source 3, can correct significant focus discrepancies.”
| Technique | Benefit |
|---|---|
| Grid Alignment | Ensures accurate calibration across the frame |
| Live View Magnification | Verifies focus precision |
| STM vs USM Testing | Identifies motor-specific calibration needs |
| Decentering Detection | Highlights alignment issues |
By following these steps, you can ensure your lens delivers sharp and consistent results. This method is particularly useful for photographers seeking professional-quality images in diverse shooting scenarios.
Step 9: Troubleshooting Common Calibration Issues
Even with meticulous preparation, calibration issues can arise, affecting the sharpness and accuracy of your images. Understanding these problems and their solutions ensures your focus remains precise, delivering consistent results.
Dealing with Front or Back Focus
Front or back focus occurs when your lens fails to align correctly with the sensor plane. This misalignment can lead to soft images, even with proper settings. Diagnosing mount wear issues is the first step in resolving this problem.
Shim adjustment techniques can correct minor misalignments. However, excessive Micro Focus Adjustment (MFA) compensations should be avoided, as they can exacerbate the issue. Temperature-related focus shifts are another factor to consider, especially in extreme conditions.
Addressing Inconsistent Focus
Inconsistent focus often stems from firmware limitations or hardware wear. Updating your camera’s firmware can improve autofocus performance, as noted in source 1. Third-party calibration tools offer additional options for fine-tuning your setup.
Testing peripheral focus points is crucial for wide-angle lenses. Decentering detection methods can identify alignment issues, ensuring sharpness across the frame. Cross-type point limitations highlight areas needing adjustment.
“A +8 MFA adjustment, as referenced in source 3, can correct significant focus discrepancies.”
| Issue | Solution |
|---|---|
| Front/Back Focus | Shim adjustments, avoid excessive MFA |
| Temperature Shifts | Monitor environmental conditions |
| Firmware Limitations | Update to the latest version |
| Peripheral Focus | Test with grid alignment |
By addressing these common issues, you can ensure your calibration process remains effective. This approach minimises errors and enhances the overall quality of your photography.
Step 10: Maintaining Your Camera’s Calibration
Maintaining your camera’s calibration is essential for consistent performance and professional results. Over time, environmental factors and usage can affect your settings, leading to less accurate results. Regular checks and updates ensure your equipment remains in top condition.
Regularly Checking Calibration Settings
Periodic checks are crucial to maintaining calibration accuracy. Create a maintenance schedule to review your camera’s settings every few months. This helps identify any drift in focus or exposure metering before it impacts your work.
Analysing EXIF data is a useful way to monitor performance. Look for inconsistencies in exposure or focus across multiple shots. If issues arise, consider a factory reset to restore default settings and recalibrate from scratch.
Updating Firmware for Improved Performance
Firmware updates can significantly enhance your camera’s metering and autofocus capabilities. Manufacturers often release updates to address bugs or improve performance. Regularly check for updates and install them to keep your equipment optimised.
For example, Iridix 7 updates, as referenced in source 2, offer improved highlight preservation. These updates ensure your camera adapts to new technologies and maintains its accuracy over time.
- Create a calibration maintenance schedule for periodic checks.
- Analyse EXIF data to monitor exposure and focus consistency.
- Perform a factory reset if calibration issues persist.
- Update firmware regularly to benefit from performance improvements.
- Take sensor cleaning precautions to avoid dust affecting calibration.
- Backup and restore configurations to save custom settings.
By following these steps, you can ensure your camera remains calibrated and ready for any shooting scenario. This process not only preserves accuracy but also extends the lifespan of your equipment.
How to Calibrate a Canon Camera for Better Dynamic Range: Final Tips
Ensuring your equipment remains in top condition is key to consistent photography results. Proper calibration and maintenance not only enhance your camera’s performance but also ensure your images retain their professional quality. Below, we explore best practices and when to seek professional assistance.
Best Practices for Consistent Results
To maintain optimal performance, store your equipment in humidity-controlled environments. This prevents moisture damage, which can affect calibration. Additionally, consider the benefits of insurance valuation for your gear. It safeguards your investment against unforeseen circumstances.
Canon Professional Services (CPS) offers valuable support for photographers. Membership provides access to expert calibration services and priority repairs. For those frequently on the move, a travel calibration kit is essential. It includes tools like grey cards and compact tripods for on-the-go adjustments.
- Store equipment in humidity-controlled environments.
- Invest in insurance valuation for added protection.
- Join CPS for expert calibration and repair services.
- Pack a travel calibration kit for convenience.
When to Seek Professional Help
While DIY maintenance is possible, certain tasks require professional expertise. Avoid attempting sensor replacements yourself, as improper handling can cause permanent damage. Instead, visit authorised UK service centres for reliable repairs and calibration.
Light meter obstructions, as highlighted in Source 1, can also affect accuracy. Professionals can diagnose and resolve such issues efficiently. Trusting experts ensures your camera performs at its best, even in challenging conditions.
| Issue | Solution |
|---|---|
| Sensor Damage | Visit authorised service centres |
| Light Meter Obstructions | Seek professional diagnosis |
| Calibration Drift | Regular professional checks |
| Complex Repairs | Rely on CPS expertise |
By following these tips, you can ensure your camera delivers consistent, high-quality results. Whether through regular maintenance or professional assistance, maintaining your equipment is the best way to achieve outstanding photography.
Conclusion
Mastering dynamic range in photography ensures your images retain detail in both highlights and shadows. Regular maintenance of your equipment is essential for consistent results. This includes periodic checks and updates to keep your camera performing at its best.
Adopting RAW shooting enhances flexibility in post-processing, allowing for greater control over exposure and colour. Future advancements, as predicted by experts, will further improve dynamic range capabilities. Staying updated with these trends ensures your photography remains cutting-edge.
For those looking to deepen their knowledge, exploring advanced techniques and resources is highly recommended. If you have questions or need further guidance, feel free to reach out. Achieving professional-quality results is within your grasp with the right approach and tools.
FAQ
What is dynamic range in photography?
Dynamic range refers to the difference between the darkest and brightest parts of an image. It determines how well a camera captures details in both shadows and highlights.
Why is dynamic range important for Canon cameras?
A higher dynamic range allows Canon cameras to produce images with well-defined details in both bright and dark areas, reducing the need for post-processing adjustments.
How does exposure meter calibration affect dynamic range?
Proper exposure meter calibration ensures accurate readings, helping to avoid overexposed highlights or underexposed shadows, which can limit the dynamic range of your images.
What tools are essential for calibrating a Canon camera?
Key tools include a tripod, a grey card, and software like RawDigger. These help ensure precise adjustments for optimal dynamic range.
How do you position a grey card for calibration?
Place the grey card in the same lighting conditions as your subject, ensuring it fills the frame. This helps the camera set accurate exposure levels.
What does a histogram reveal about exposure?
A histogram displays the distribution of light in an image. Peaks on the left indicate underexposure, while peaks on the right suggest overexposure.
How do you add exposure compensation?
Use the exposure compensation dial or menu on your Canon camera to adjust brightness levels, ensuring balanced highlights and shadows.
Why use RawDigger for calibration verification?
RawDigger analyses RAW files to check for overexposure or underexposure, providing a more accurate assessment than in-camera previews.
How do you fine-tune calibration for RAW files?
Adjust calibration points based on ISO settings and lighting conditions to ensure consistent results across different shooting scenarios.
What are common calibration issues and how to fix them?
Front or back focus issues can arise. Use a cardboard mat to test and adjust focus points, ensuring sharpness across the frame.
How often should you check your camera’s calibration?
Regularly verify calibration settings, especially after firmware updates or significant changes in shooting conditions, to maintain optimal performance.

