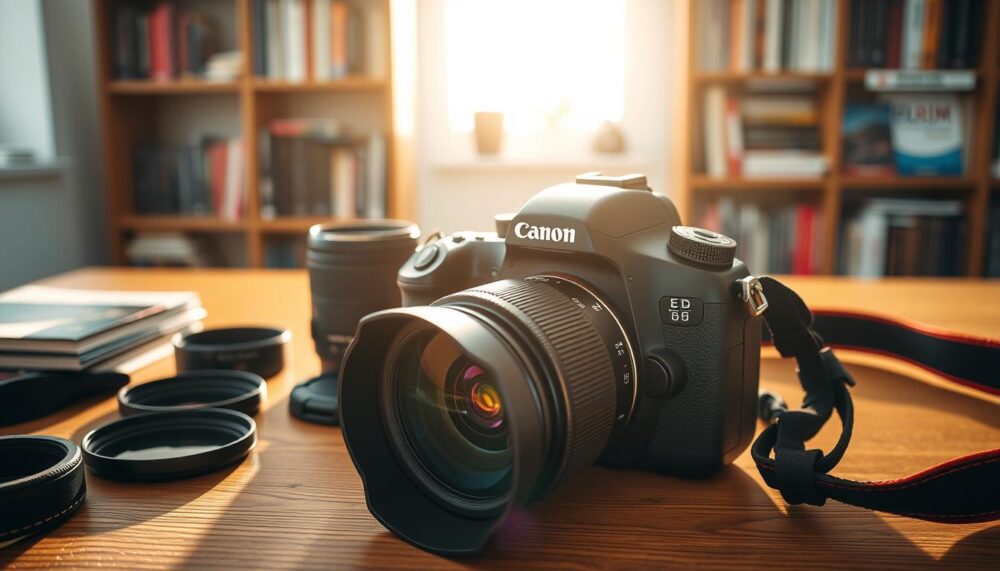
Welcome to the fascinating world of photography, where creativity meets technology. This guide is designed to help you unlock the full potential of your Canon DSLR, making it an invaluable tool for capturing stunning images. Whether you’re a complete novice or someone looking to refine your skills, this resource is tailored to your needs.
With over 30 years of experience in photography and a professional teaching background since 2010, I’ve dedicated my career to helping enthusiasts like you master their craft. My goal is to demystify the technical aspects of photography, providing clear, practical advice that you can apply immediately.
Starting with a DSLR might feel overwhelming at first, but don’t worry. Every photographer begins somewhere, and with patience and practice, you’ll soon find yourself confidently navigating its features. This guide will cover essential topics such as the exposure triangle, focusing techniques, file formats, and maintenance tips to ensure your camera stays in top condition.
Photography is a journey, and this guide is here to support you every step of the way. Let’s dive in and explore the endless possibilities your Canon DSLR has to offer.
Key Takeaways
- Learn the basics of photography with a Canon DSLR.
- Understand essential features like the exposure triangle and focusing techniques.
- Discover practical tips for camera maintenance.
- Gain confidence through gradual skill development.
- Explore the creative potential of your camera.
Introduction to Canon DSLR Cameras
Photography is an art form that blends technical precision with artistic vision. At the core of this craft lies the DSLR, a powerful tool that has revolutionised the way we capture images. Understanding its mechanics and advantages is the first step towards mastering photography.
What is a DSLR Camera?
A DSLR, or Digital Single-Lens Reflex camera, operates using a mirror and prism system. Light enters through the lens, reflects off a mirror, and travels through a prism to the optical viewfinder. This allows for real-time composition, ensuring what you see is what you capture.
When the shutter button is pressed, the mirror flips up, allowing light to hit the sensor directly. This mechanism sets DSLRs apart from mirrorless cameras, offering a tactile and immersive shooting experience.
Why Choose a Canon DSLR?
Canon has built a reputation for excellence in the world of photography. Their DSLRs are known for their robust build quality, with many models featuring weather-sealed bodies and ergonomic designs. This ensures durability and comfort, even during extended shooting sessions.
Another standout feature is Canon’s EF and EF-S lens compatibility. This extensive range of lenses allows photographers to adapt to various shooting scenarios. Additionally, Canon’s renowned colour science delivers vibrant and true-to-life images, making it a favourite among professionals and enthusiasts alike.
Understanding Your Canon DSLR Camera
Exploring the mechanics of a DSLR reveals the brilliance behind its design. This section delves into its key components and operational principles, offering a clear understanding of what makes these devices so effective.
Key Components of a DSLR
At the heart of a DSLR lies the pentaprism, which redirects light from the lens to the optical viewfinder. This ensures accurate framing and composition. The CMOS sensor captures light, converting it into digital signals to create an image.
The mirror box assembly plays a crucial role. It reflects light to the viewfinder before flipping up during exposure, allowing light to reach the sensor. This mechanism ensures precise timing and sharp results.
How a DSLR Camera Works
The shutter mechanism is pivotal. It consists of two curtains that open and close to control exposure time. This ensures the sensor receives the right amount of light for a balanced image.
Sensor types vary, with APS-C and full-frame being the most common. APS-C sensors have a crop factor, making them ideal for telephoto shots. Full-frame sensors, however, offer superior low-light performance and wider angles.
During exposure, light travels through the lens, reflects off the mirror, and hits the sensor. The mirror then flips up, allowing the shutter to open and capture the scene.
| Sensor Type | Crop Factor | Best Use Case |
|---|---|---|
| APS-C | 1.5x-1.6x | Telephoto photography |
| Full-Frame | 1x | Low-light and wide-angle photography |
Optical viewfinders provide a real-time, lag-free view of the scene. Electronic viewfinders, on the other hand, offer additional information like exposure previews. Choosing between them depends on personal preference and shooting style.
How to Use Your Canon DSLR Camera: Getting Started
Embarking on your photography journey starts with familiarising yourself with your equipment. This section guides you through the initial setup and essential controls, ensuring you’re ready to capture stunning images.
Unboxing and Setting Up Your Camera
Begin by unboxing your camera and ensuring all components are present. Charge the battery fully and insert it into the designated slot. If your model supports dual memory cards, configure them for backup or overflow storage.
Attach the lens by aligning the red dots on the camera body and lens mount. Twist gently until it clicks into place. This ensures a secure connection and optimal performance.
Basic Camera Controls and Buttons
Familiarise yourself with the primary controls. The shutter button is central to capturing images. Use the half-press technique to focus before fully pressing to take the shot.
Explore the main dial for adjusting settings like aperture and shutter speed. The Quick Control Dial allows quick access to essential functions, while the AF-ON button enables autofocus without using the shutter button.
- AF Point Selection: Choose focus points for precise composition.
- Drive Mode: Switch between single shot, continuous, and timer modes.
- Exposure Lock: Maintain consistent exposure for a series of shots.
Navigate the menu on the LCD screen to customise your camera’s settings. Ensure the language is set to British English for ease of use.
Mastering the Mode Dial
The mode dial is a gateway to unlocking the creative potential of your photography. It allows you to switch between different shooting modes, each designed for specific scenarios. Understanding these modes is essential for achieving the desired results in your images.
Auto Mode vs Manual Mode
Auto mode is ideal for beginners, as it handles all settings automatically. However, it has limitations, particularly in challenging lighting conditions like backlit scenes. For greater control, manual mode lets you adjust aperture, shutter speed, and ISO independently. This is especially useful in studio setups or for long exposures.
Aperture Priority and Shutter Priority
Aperture Priority (Av) mode allows you to control the aperture while the camera sets the shutter speed. This is perfect for managing depth of field, whether you’re shooting portraits or landscapes. Shutter Priority (Tv) mode, on the other hand, lets you set the shutter speed while the camera adjusts the aperture. Use it to freeze fast action or create motion blur effects.
- Auto mode limitations: Struggles with complex lighting, such as backlit scenes.
- Aperture priority: Ideal for controlling depth of field in portraits and landscapes.
- Shutter priority: Freezes motion at high speeds (1/1000s+) or creates blur at slower speeds (1/30s-).
- Manual mode: Best for studio lighting and long exposures.
- Custom modes (C1/C2): Save frequently used configurations for quick access.
Understanding the Exposure Triangle
The exposure triangle is the cornerstone of photography, blending light, timing, and sensitivity. It consists of three key elements: aperture, shutter speed, and ISO. Together, they determine how light is captured, shaping the final image.
Aperture, Shutter Speed, and ISO
Aperture controls the amount of light entering the lens and affects depth of field. A wide aperture like f/1.8 creates a shallow depth of field, ideal for portraits. A narrow aperture like f/16 ensures sharpness across the frame, perfect for landscapes.
Shutter speed dictates how long the sensor is exposed to light. Fast speeds like 1/4000s freeze motion, such as a hummingbird in flight. Slow speeds like 30s capture light trails, such as stars in the night sky.
ISO adjusts the sensor’s sensitivity to light. Lower values like ISO 100 produce clean, noise-free images. Higher values like ISO 1600+ are useful in low light but may introduce noise.
Balancing Exposure for Perfect Shots
Balancing these elements ensures optimal exposure. For example, a bright scene may require a narrow aperture, fast shutter speed, and low ISO. A dark scene might need a wide aperture, slow shutter speed, and higher ISO.
Use exposure compensation to adjust brightness in tricky conditions. For snow scenes, increase exposure by +1 to +3 EV. For backlit subjects, decrease exposure by -1 to -3 EV.
Review the histogram to avoid clipped highlights or shadows. A balanced histogram ensures details are preserved, especially in RAW files.
| Setting | Example | Effect |
|---|---|---|
| Aperture | f/1.8 vs f/16 | Shallow vs deep depth of field |
| Shutter Speed | 1/4000s vs 30s | Freezes motion vs creates blur |
| ISO | ISO 100 vs ISO 1600 | Clean image vs noise |
Focusing Techniques for Sharp Images
Achieving sharp images requires mastering the art of focus. Whether capturing a still portrait or a fast-moving subject, understanding the right techniques ensures clarity and precision in every shot.
Autofocus Modes Explained
Autofocus simplifies the process of achieving sharpness. Single-shot AF is ideal for stationary subjects, allowing you to lock focus and recompose the frame. This technique is perfect for portrait work.
For moving subjects, AI Servo continuously adjusts focus, making it ideal for tracking cyclists or athletes. It ensures your subject remains sharp, even as they move across the frame.
Manual Focus: When and How to Use It
Manual focus offers unparalleled control, especially in challenging conditions. Use focus peaking or magnification in Live View to achieve pinpoint accuracy. These tools highlight the sharpest areas, ensuring precise results.
Customising back-button focus separates focusing from the shutter button, a technique favoured in wildlife photography. It allows for quick adjustments without interrupting the shooting process.
Selecting the right focus point is equally important. A 65-point cross-type system provides flexibility, ensuring accurate focus even in complex compositions. Experiment with different settings to find what works best for your style.
Metering and Exposure Compensation
Mastering metering and exposure compensation is essential for achieving balanced and well-lit photographs. These tools allow you to control how your camera interprets light, ensuring your images are neither too dark nor too bright. By understanding these features, you can adapt to various lighting conditions and capture stunning results.
Understanding Metering Modes
Metering modes determine how your camera measures light. Evaluative metering is ideal for general scenes, as it analyses the entire frame to calculate exposure. This mode works well for landscapes or group shots where even lighting is crucial.
Partial metering focuses on a smaller area, making it perfect for backlit portraits. It ensures the subject is correctly exposed, even if the background is overly bright. For precise control, spot metering measures light from a tiny portion of the frame. This is particularly useful for capturing details like the moon or a single subject in a complex scene.
Using Exposure Compensation Effectively
Exposure compensation allows you to adjust brightness levels manually. If your camera’s metering system overexposes a snowy scene, dialling in a positive value (+1 to +3 EV) ensures the snow appears white, not grey. Conversely, reducing exposure (-1 to -3 EV) prevents backlit subjects from appearing too dark.
For advanced techniques, consider exposure bracketing. This involves taking multiple shots at different exposure levels, which can later be merged for HDR images. Additionally, the AE Lock function maintains consistent exposure across a series of shots, ideal for creating seamless panoramas.
- Evaluative metering: Best for general landscape and scene photography.
- Partial metering: Ideal for backlit portrait situations.
- Spot metering: Perfect for moon photography or precise exposure calculations.
- Exposure bracketing: Essential for HDR merge techniques.
- AE Lock function: Maintains consistent exposure across panoramas.
White Balance and Colour Settings
Understanding white balance is key to capturing true-to-life colours in your photographs. It ensures that the lighting in your scene is accurately represented, preventing unwanted colour casts. Whether you’re shooting indoors or outdoors, mastering this setting can significantly enhance your images.
Auto White Balance vs Custom Settings
Auto white balance (AWB) is a convenient feature that adjusts colours automatically. However, it can struggle in challenging conditions, such as tungsten or fluorescent lighting. In these scenarios, the camera may produce a warm or cool tint, altering the natural look of your picture.
For greater control, custom settings allow you to fine-tune the white balance. Using a grey card under mixed lighting ensures accurate results. Additionally, Kelvin temperature adjustments let you manually set the colour temperature, offering precision in every shot.
Adjusting White Balance for Different Lighting
Preset white balances, such as shade or cloudy, add warmth to your images, ideal for outdoor photography. These settings compensate for cooler tones, enhancing the overall colour balance.
For post-processing flexibility, shooting in RAW is highly recommended. RAW files retain more data, allowing you to adjust the white balance without compromising image quality. This is particularly useful when working with complex lighting conditions.
Experiment with different colour profiles, such as Faithful or Landscape, to achieve the desired look. Each profile enhances specific tones, giving your picture a unique character.
Using the Viewfinder and LCD Screen
The viewfinder and LCD screen are essential tools for composing and reviewing your shots. Each serves a unique purpose, enhancing your ability to capture and evaluate images with precision. Understanding their features ensures a seamless workflow, whether you’re framing a scene or checking critical details.
Composing Shots with the Viewfinder
The viewfinder offers a real-time, lag-free view of your subject. Models with 100% coverage provide an accurate representation of the final image, while those with 95% may crop slightly. This difference is crucial for precise composition, especially in professional settings.
Diopter adjustment is another key feature. It compensates for eyesight variations, ensuring a clear view for photographers with or without glasses. Simply rotate the dial until the scene appears sharp, allowing you to focus on framing rather than visual clarity.
Reviewing Images on the LCD Screen
The LCD screen is invaluable for reviewing and refining your shots. Touchscreen models allow you to drag the AF point for precise positioning, ensuring your subject is perfectly in focus. This feature is particularly useful for dynamic compositions or when shooting from awkward angles.
Playback zoom lets you check critical details, such as eyelashes or textures, to confirm sharpness. Highlight alert, often referred to as “blinkies,” indicates overexposed areas. Activating this feature helps you avoid blown highlights, ensuring balanced exposure in every image.
- Viewfinder coverage: 100% vs 95% optical view differences.
- Diopter adjustment: Compensates for eyesight variations.
- LCD touchscreen: Drag AF point positioning for precise focus.
- Playback zoom: Checking critical focus on details like eyelashes.
- Highlight alert: Blown highlight blinkies activation.
Shooting in Different Lighting Conditions
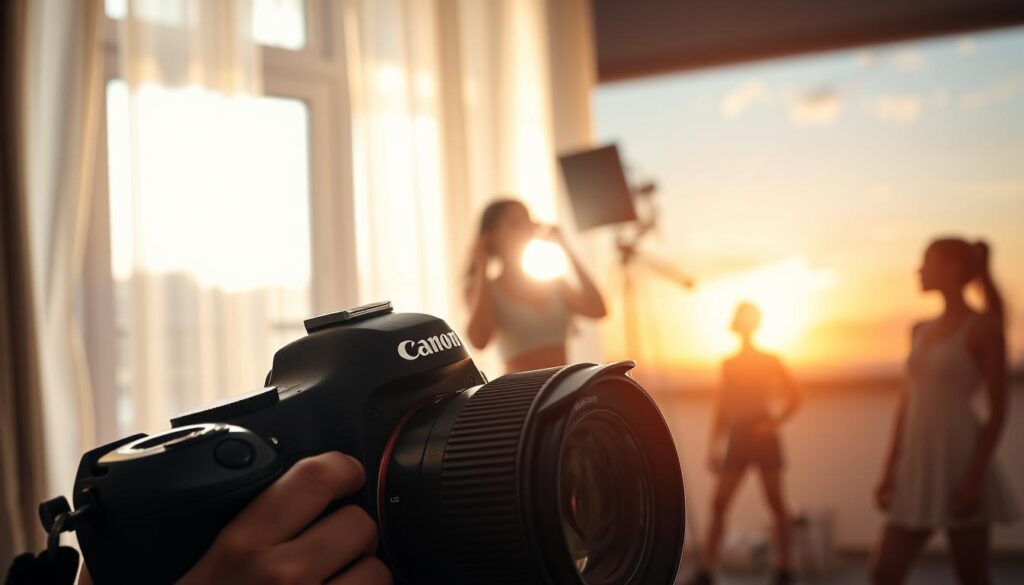
Adapting to various lighting conditions is a skill every photographer must master. Whether you’re capturing a sunset or shooting indoors, understanding how to manipulate light ensures your images are vibrant and well-balanced. This section explores techniques for low-light scenarios and handling bright, harsh conditions.
Tips for Low-Light Photography
Low-light situations, such as evening events or dim interiors, present unique challenges. Using a tripod with a 2-second self-timer minimises camera shake, ensuring sharp results. Adjusting the shutter speed to a slower setting allows more light to reach the sensor, while maintaining stability.
High ISO settings are often necessary in low light, but they can introduce noise. In-camera noise reduction tools help mitigate this, though post-processing software like Adobe Lightroom offers more control. Balancing exposure with these techniques ensures clean, detailed images even in challenging conditions.
Handling Bright and Harsh Light
Bright sunlight can create harsh shadows and overexposed highlights. Neutral density (ND) filters, such as a 6-stop filter, reduce the amount of light entering the lens. This allows for longer shutter speeds, ideal for creative effects like silky waterfalls or blurred motion.
Fill flash is another effective tool. It balances ambient light with artificial illumination, ensuring subjects are well-lit without losing background detail. Highlight priority mode preserves details in bright areas, such as clouds, preventing them from being washed out.
| Lighting Condition | Recommended Settings |
|---|---|
| Direct Sunlight | ISO 50, F/2.0, Shutter: 1/1600 |
| Shade | ISO 200, F/1.8, Shutter: 1/1000 |
| Indoors with Natural Light | ISO 320, F/2.2, Shutter: 1/640 |
| Backlit | ISO 500, F/2.8, Shutter: 1/320 |
| Low Light (e.g., Sparkler Exit) | ISO 1000, F/1.4, Shutter: 1/320 |
For more detailed examples of photography settings in various lighting scenarios, visit this guide. Mastering these techniques ensures you’re prepared for any lighting challenge, enhancing the quality and creativity of your work.
Exploring Advanced Shooting Modes
Advanced shooting modes open up a world of creative possibilities, allowing photographers to tailor their settings to specific scenarios. These modes simplify the process of capturing stunning images, making them ideal for both beginners and seasoned enthusiasts. By understanding their unique features, you can elevate your photography to new heights.
Portrait, Landscape, and Sports Modes
Portrait mode is designed to enhance the beauty of your subject. It automatically optimises skin tones and softens backgrounds, creating a flattering and professional look. This mode is perfect for capturing people, whether in a studio or outdoors.
Landscape mode ensures sharpness across the entire frame, making it ideal for scenic shots. It enhances colours and details, bringing out the best in natural settings. Use this mode for capturing expansive views or intricate details in nature.
Sports mode excels in capturing fast-moving subjects. With predictive autofocus and high burst rates, it ensures every moment is sharp and clear. This mode is a favourite for action photography, such as sports or wildlife.
Creative Filters and Effects
Creative filters add a unique touch to your picture, transforming ordinary scenes into artistic masterpieces. The miniature effect simulates tilt-shift photography, giving your images a toy-like appearance. Experiment with this filter for a playful and distinctive look.
Multiple exposure techniques allow you to combine several images into one, creating surreal and imaginative compositions. This in-camera feature is perfect for those who enjoy experimenting with layered visuals.
HDR mode is ideal for high-contrast scenes. It automatically aligns handheld shots, ensuring balanced exposure and vibrant details. Use this mode for landscapes or architecture to capture every nuance of light and shadow.
- Portrait mode: Automatic skin tone optimisation for flattering results.
- Sports mode: Predictive AF and high burst rates for action shots.
- Creative filters: Miniature effect and tilt-shift simulation for artistic flair.
- Multiple exposure: In-camera compositing for surreal visuals.
- HDR mode: Auto-alignment for balanced exposure in high-contrast scenes.
Understanding File Formats and Quality
Choosing the right file format is crucial for achieving the best image quality. Whether you’re a beginner or a seasoned photographer, understanding the differences between RAW and JPEG can significantly impact your results. Each format has its strengths, and selecting the appropriate one depends on your creative goals and workflow.
RAW vs JPEG: Which to Choose?
RAW files offer unparalleled flexibility, capturing 14-bit colour depth compared to JPEG’s 8-bit. This ensures greater dynamic range, allowing for detailed adjustments in post-processing. For example, recovering shadows or highlights is far easier with RAW, making it ideal for challenging lighting conditions.
On the other hand, JPEG files are smaller and more convenient for quick sharing. They use compression to reduce file size, with options like fine or superfine levels. However, this compression can lead to a loss of detail, especially in complex scenes.
Optimising Image Quality Settings
To maximise image quality, consider using a dual card setup. Shooting in RAW+JPEG provides a backup while offering flexibility for editing and sharing. Canon’s C-RAW format is another option, offering compressed RAW files without significant quality loss.
Colour space selection also plays a role. Adobe RGB provides a wider gamut, ideal for professional printing, while sRGB is better suited for digital displays. Experiment with these settings to find the best balance for your workflow.
Maintaining and Cleaning Your Canon DSLR
Proper maintenance ensures your equipment performs at its best. Regular care not only extends the lifespan of your gear but also guarantees consistent, high-quality results. From cleaning the lens to safeguarding the sensor, these practices are essential for every photographer.
Basic Camera Maintenance Tips
Start by monitoring the shutter count to estimate the lifespan of your device. High usage may indicate the need for servicing. Additionally, store your camera in a dry environment using silica gel packs to control humidity. This prevents moisture damage, especially in unpredictable weather.
Weather-sealed models require extra attention. After exposure to rain, inspect and clean the gaskets to maintain their effectiveness. Regularly check the battery compartment and memory card slots for dust or debris, ensuring smooth operation.
Cleaning the Lens and Sensor
The lens is the gateway to sharp, clear images. Use a microfiber cloth in a circular motion to remove fingerprints or smudges. Avoid harsh chemicals, as they can damage the coating. For stubborn dirt, a specialised lens cleaning solution is recommended.
The sensor is equally critical. Enable the automatic dust delete data mapping feature to detect and remove particles. For manual cleaning, use a sensor swab with a gentle touch. Always power off the device before attempting this process to avoid damage.
- Sensor cleaning: Automatic dust delete data mapping.
- Lens microfiber technique: Circular motion cleaning.
- Weather sealing: Gasket maintenance after rain.
- Storage humidity control: Silica gel usage.
- Shutter count monitoring: Estimating camera lifespan.
Tips for Improving Your Photography Skills
Photography skills evolve through consistent practice and experimentation. Whether you’re capturing landscapes or portraits, refining your technique and exploring new settings can elevate your work. This section focuses on composition techniques and the importance of experimenting with different configurations to enhance your craft.
Practising Composition Techniques
Composition is the foundation of a compelling image. The rule of thirds is a classic technique that divides the frame into a grid. Placing your subject along these lines or at their intersections creates balance and interest. Enable the grid overlay on your camera’s display to guide your framing.
Leading lines are another powerful tool. Use natural or architectural elements, such as roads or fences, to draw the viewer’s eye into the scene. This technique adds depth and directs attention to your focal point.
Exposure bracketing is useful for challenging lighting conditions. Capture three shots at different exposure levels (±1 EV) to ensure you have a well-balanced image. This method is particularly effective for high-contrast scenes like sunsets or backlit subjects.
Experimenting with Different Settings
Understanding the interplay between shutter speed, aperture, and ISO is crucial. Adjusting the shutter speed can freeze motion or create motion blur, while the aperture controls depth of field. Experiment with these settings to achieve the desired effect in your images.
Focal length experiments offer new perspectives. Prime lenses provide sharpness and a fixed field of view, while zoom lenses offer versatility. Test both to understand their strengths and limitations.
Reviewing EXIF data is a valuable practice. Analyse shooting information like aperture, shutter speed, and ISO to identify areas for improvement. This data helps refine your technique and achieve consistent results.
| Technique | Benefit |
|---|---|
| Rule of Thirds | Creates balanced and engaging compositions |
| Leading Lines | Adds depth and directs viewer’s attention |
| Exposure Bracketing | Ensures balanced exposure in high-contrast scenes |
| Focal Length Experiments | Offers diverse perspectives and creative options |
| EXIF Analysis | Identifies areas for improvement in technique |
Conclusion
Mastering the art of photography is a rewarding journey that combines technical skill with creative expression. This guide has equipped you with essential knowledge, from controlling exposure to mastering focus techniques. Remember, skill development comes with consistent practice and experimentation.
As you progress, consider investing in quality lenses or enrolling in advanced courses to further refine your craft. The Canon dslr system offers exceptional upgradability, ensuring your camera grows with your skills. Whether you’re capturing landscapes or portraits, the possibilities are endless.
Photography is not just a skill—it’s a lifelong journey. Embrace the challenges, celebrate the successes, and continue exploring the world through your lens. With dedication and passion, every shot becomes a step forward in your creative evolution.
FAQ
What is the difference between Auto Mode and Manual Mode?
Auto Mode handles all settings automatically, ideal for beginners. Manual Mode gives full control over aperture, shutter speed, and ISO, allowing for creative flexibility.
How does aperture affect my photos?
Aperture controls the amount of light entering the lens and influences depth of field. A wide aperture (low f-number) creates a shallow depth of field, while a narrow aperture (high f-number) keeps more of the scene in focus.
When should I use fast shutter speed?
Fast shutter speed is perfect for freezing motion, such as in sports or wildlife photography. It ensures sharp images of fast-moving subjects.
What is the purpose of white balance?
White balance adjusts the colour temperature of your images to match the lighting conditions. Auto White Balance works well in most situations, but custom settings can enhance accuracy in tricky lighting.
How do I clean my Canon DSLR lens?
Use a microfiber cloth and lens cleaning solution. Gently wipe the lens in a circular motion, avoiding excessive pressure to prevent scratches.
What are the benefits of shooting in RAW format?
RAW files retain more detail and allow greater flexibility in post-processing compared to JPEG. They are ideal for professional photographers seeking the highest image quality.
How can I improve low-light photography?
Use a wider aperture, slower shutter speed, or higher ISO. A tripod can also help stabilise the camera and reduce blur in dim conditions.
What is exposure compensation used for?
Exposure compensation adjusts the brightness of your image when the camera’s metering system doesn’t produce the desired result. It’s useful in high-contrast scenes.
How do I choose the right focus mode?
Autofocus is great for most situations, while manual focus is better for precise control, such as in macro or low-light photography.
What are the best settings for portrait photography?
Use a wide aperture (e.g., f/2.8) for a shallow depth of field, ensuring the subject stands out. Opt for soft, natural lighting to enhance skin tones.
